
https://immich.app/docs/install/docker-compose
一、Docker部署
1. 创建文件夹
创建一个您选择的目录(例如)来保存 and 文件。./immich-appdocker-compose.yml.env
移动到您创建的目录
mkdir ./immich-app
cd ./immich-app
2. 下载docker-compose配置文件
通过运行以下命令下载 docker-compose.yml 和 example.env:
获取docker-compose.yml文件
wget -O docker-compose.yml https://github.com/immich-app/immich/releases/latest/download/docker-compose.yml获取 .env 文件
wget -O .env https://github.com/immich-app/immich/releases/latest/download/example.env或者从浏览器下载并将文件移动到您创建的目录。
注意:如果您从浏览器下载了文件,请确保重命名为 。example.env.env
3. 编辑配置文件
示例内容.yaml
#
# WARNING: To install Immich, follow our guide: https://docs.immich.app/install/docker-compose
#
# Make sure to use the docker-compose.yml of the current release:
#
# https://github.com/immich-app/immich/releases/latest/download/docker-compose.yml
#
# The compose file on main may not be compatible with the latest release.

name: immich

services:
  immich-server:
    container_name: immich_server
    image: ghcr.io/immich-app/immich-server:${IMMICH_VERSION:-release}
    # extends:
    #   file: hwaccel.transcoding.yml
    #   service: cpu # set to one of [nvenc, quicksync, rkmpp, vaapi, vaapi-wsl] for accelerated transcoding
    volumes:
      # Do not edit the next line. If you want to change the media storage location on your system, edit the value of UPLOAD_LOCATION in the .env file
      #不要编辑下一行。如果您想更改系统上的媒体存储位置,请编辑 .env 文件中的 UPLOAD_LOCATION 值。
      - ${UPLOAD_LOCATION}:/data
      - /etc/localtime:/etc/localtime:ro
      - /volume2/photo:/photo  # 将外部目录挂载到容器的/photo路径
    env_file:
      - .env
    ports:
      - '2283:2283'
    depends_on:
      - redis
      - database
    restart: always
    healthcheck:
      disable: false

  immich-machine-learning:
    container_name: immich_machine_learning
    # For hardware acceleration, add one of -[armnn, cuda, rocm, openvino, rknn] to the image tag.
    # Example tag: ${IMMICH_VERSION:-release}-cuda
    image: ghcr.io/immich-app/immich-machine-learning:${IMMICH_VERSION:-release}
    # extends: # uncomment this section for hardware acceleration - see https://docs.immich.app/features/ml-hardware-acceleration
    #   file: hwaccel.ml.yml
    #   service: cpu # set to one of [armnn, cuda, rocm, openvino, openvino-wsl, rknn] for accelerated inference - use the `-wsl` version for WSL2 where applicable
    volumes:
      - ./model-cache:/cache
    env_file:
      - .env
    restart: always
    healthcheck:
      disable: false

  redis:
    container_name: immich_redis
    image: docker.io/valkey/valkey:8-bookworm@sha256:fea8b3e67b15729d4bb70589eb03367bab9ad1ee89c876f54327fc7c6e618571
    healthcheck:
      test: redis-cli ping || exit 1
    restart: always

  database:
    container_name: immich_postgres
    image: ghcr.io/immich-app/postgres:14-vectorchord0.4.3-pgvectors0.2.0@sha256:bcf63357191b76a916ae5eb93464d65c07511da41e3bf7a8416db519b40b1c23
    environment:
      POSTGRES_PASSWORD: ${DB_PASSWORD}
      POSTGRES_USER: ${DB_USERNAME}
      POSTGRES_DB: ${DB_DATABASE_NAME}
      POSTGRES_INITDB_ARGS: '--data-checksums'
      # Uncomment the DB_STORAGE_TYPE: 'HDD' var if your database isn't stored on SSDs
      # DB_STORAGE_TYPE: 'HDD'
    volumes:
      # Do not edit the next line. If you want to change the database storage location on your system, edit the value of DB_DATA_LOCATION in the .env file
      - ${DB_DATA_LOCATION}:/var/lib/postgresql/data
    shm_size: 128mb
    restart: always

volumes:
  model-cache:
示例内容.env
# You can find documentation for all the supported env variables at https://docs.immich.app/install/environment-variables

# The location where your uploaded files are stored
#您上传文件的存储位置

UPLOAD_LOCATION=./library

# The location where your database files are stored. Network shares are not supported for the database
#数据库文件的存储位置。不支持将数据库存放在网络共享上。
DB_DATA_LOCATION=./postgres

# To set a timezone, uncomment the next line and change Etc/UTC to a TZ identifier from this list: https://en.wikipedia.org/wiki/List_of_tz_database_time_zones#List
#要设置时区,请取消下一行的注释,并将Etc/UTC更改为此列表中的TZ标识符。
# TZ=Etc/UTC

# The Immich version to use. You can pin this to a specific version like "v1.71.0"
#要使用的Immich版本。您可以将其固定到特定版本,例如"v1.71.0"。
IMMICH_VERSION=release

# Connection secret for postgres. You should change it to a random password
#Postgres 的连接密钥。你应该将其更改为一个随机密码。
# Please use only the characters `A-Za-z0-9`, without special characters or spaces
#请仅使用字符 `A-Za-z0-9`,不要使用特殊字符或空格
DB_PASSWORD=postgres

# The values below this line do not need to be changed  此行以下的值无需更改
###################################################################################
DB_USERNAME=postgres
DB_DATABASE_NAME=immich
4. 修改docker-compose.yml文件
现在几乎不用修改
5、 启动容器
docker compose up -d6、后台管理
浏览器输入输入NAS IP:2283,当出现图标则说明部署完成
二、immich外部图库与中文地图
1、immich外部图库
https://www.bilibili.com/video/BV1dJ4m1e79r?t=48.7
https://immich.app/docs/guides/external-library
https://github.com/immich-app/immich/discussions/3293
视频播放:【群晖NAS-36期 immich外部图库与中文地图】 https://www.bilibili.com/video/BV1qz421q7Do
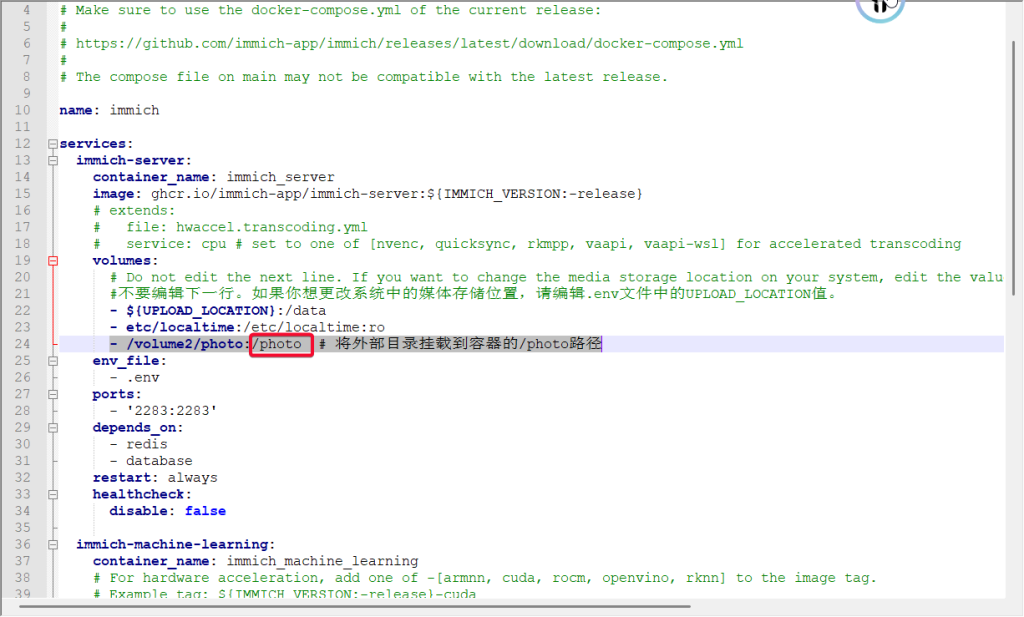
1.1、将目录装载到容器中
编辑以在docker-compose.yml中immich_server的volumes:
在该部分下方添加您的外部文件夹挂载配置。例如:
- /volume2/photo:/photo # 将外部目录挂载到容器的/photo路径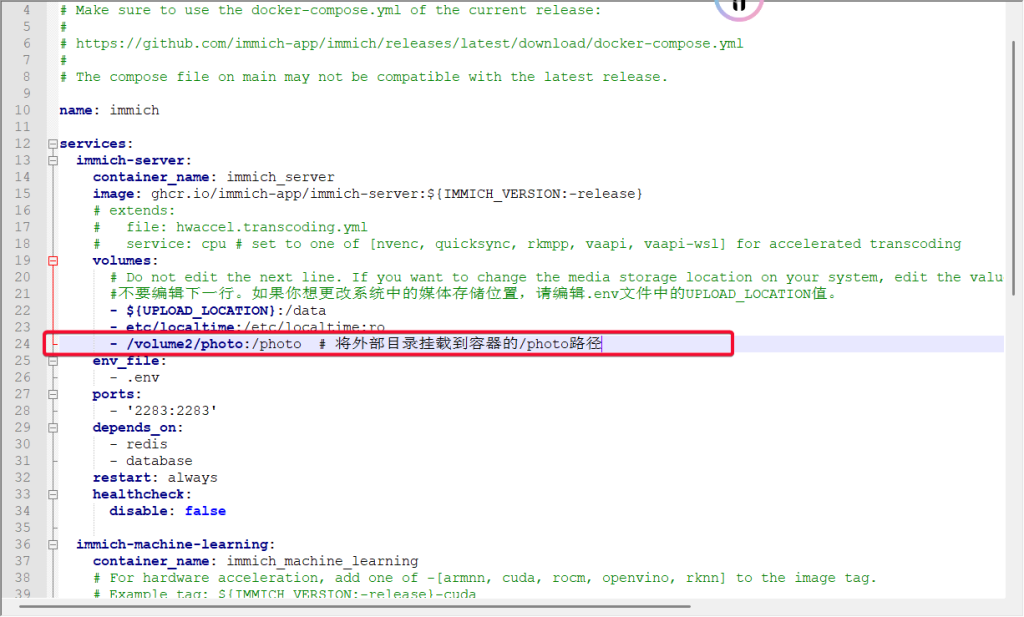
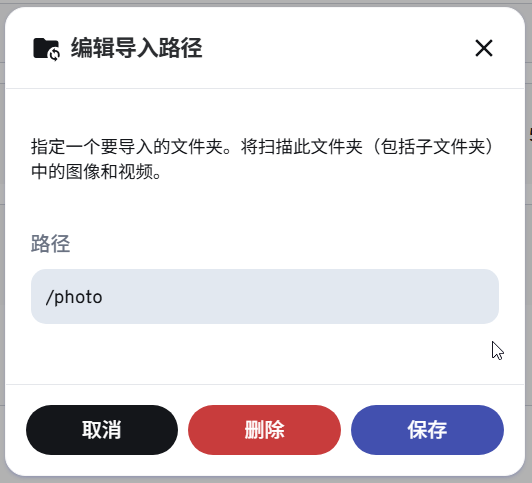
1.2、在web界面进行配置
2.1、单击 系统管理 -> 外部图库

2.2、单击 创建图库
选择拥有库的用户,以后无法更改(这点非常好,可以为每个人指定一个库,Photoprism好像没有这个功能)

输入 然后点击 添加/photos(这个就是上面配置文件中冒号后面容器的路径),这里填写的地址是主机容器内部的地址
2、中文地图
1、注册账号
Maps for developers | MapTiler
选择语言,中文
浅色模式 ;immich默认地图主题 style.json 的 URL
https://tiles.immich.cloud/v1/style/light.json点击【定位图标】,填写定位地址
使用矢量样式,将 JSON 样式的链接复制到 Maplibre、OpenLayers 或移动 SDK 中。
https://api.maptiler.com/maps/019a430d-b42b-7b3b-954e-04ee50779376/style.json?key=dooZoQVH984mmfkrcalR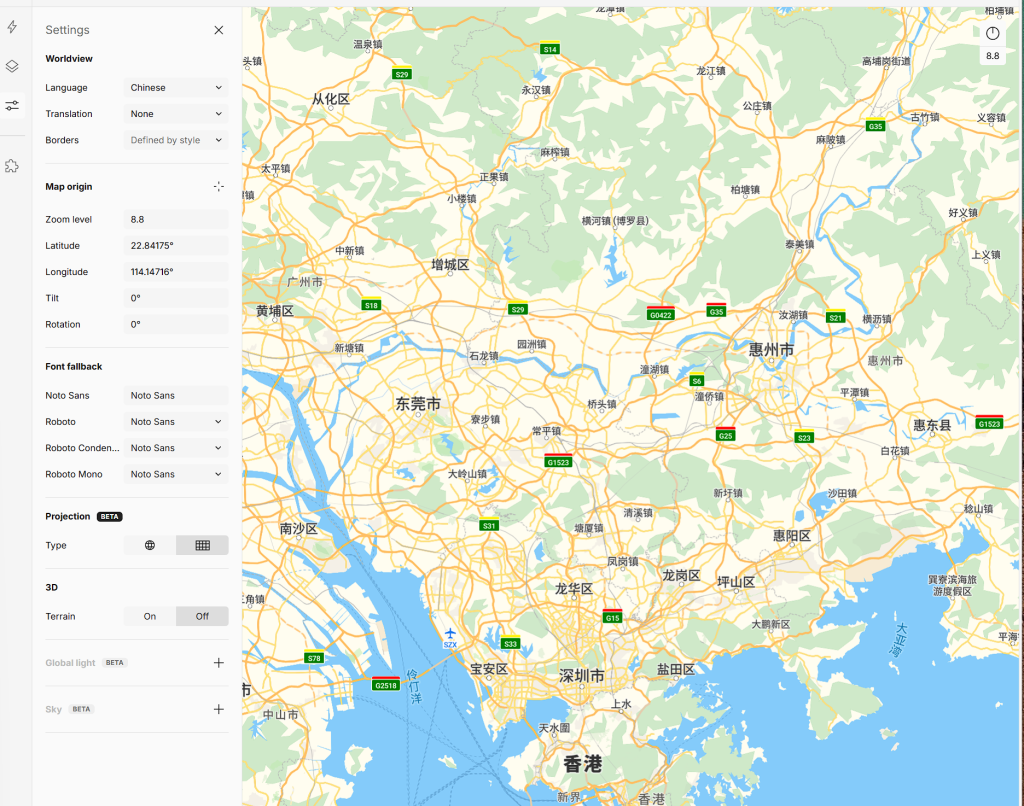
三、远程机器学习
1、下载模型
下载自己需要的大模型
immich支持多种模型,不过需要自己提前下载。
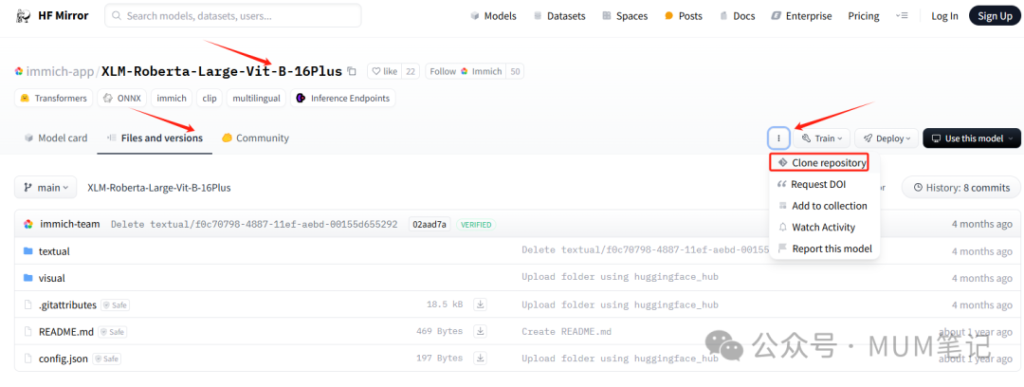
使用国内镜像:HF-Mirror
我个人推荐小伙伴们优先下载这两个模型:一个是人脸识别的【immich-app/antelopev2】,另一个是对中文支持非常不错的【immich-app/XLM-Roberta-Large-Vit-B-16Plus】
模型下载
2、查看模型加载成功
方法一:模型起效验证
这时候到你的docker-compose.yml文件夹,执行以下指令docker-compose logs -f查看
docker-compose logs -f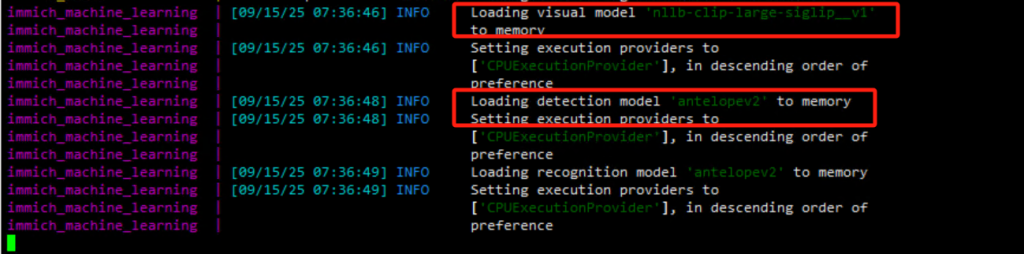
方法二|、
先查看docker运行的模型机器的id
docker psdocker logs -f 学习机器的ID关注其中immich_machine_learning容器的输出,如果看到图中红框样式的输出,就代表模型加载成功了。
3、docker安装远程机器学习
官方操作文档:远程机器学习 |伊米奇
CUDA
- GPU必须具备5.2或更高计算能力。
- 服务器必须安装官方的NVIDIA驱动。
- 安装的驱动程序必须是 >= 545(必须支持 CUDA 12.3)。
- 在Linux上(WSL2除外),你还需要安装NVIDIA Container Toolkit。
3.1安装 NVIDIA 容器工具包
安装 NVIDIA 容器工具包 — NVIDIA 容器工具包
与:Ubuntu、Debian 合作apt
这些说明应适用于任何基于 Debian 的发行版。
3.1.1:安装以下说明的前提条件:
sudo apt-get update && sudo apt-get install -y --no-install-recommends \
   curl \
   gnupg2
3.1.2:配置生产仓库:
curl -fsSL https://nvidia.github.io/libnvidia-container/gpgkey | sudo gpg --dearmor -o /usr/share/keyrings/nvidia-container-toolkit-keyring.gpg \
  && curl -s -L https://nvidia.github.io/libnvidia-container/stable/deb/nvidia-container-toolkit.list | \
    sed 's#deb https://#deb [signed-by=/usr/share/keyrings/nvidia-container-toolkit-keyring.gpg] https://#g' | \
    sudo tee /etc/apt/sources.list.d/nvidia-container-toolkit.list
3.1.3:从仓库更新包列表:
sudo apt-get update3.1.4:安装 NVIDIA 容器工具包:
export NVIDIA_CONTAINER_TOOLKIT_VERSION=1.18.1-1
  sudo apt-get install -y \
      nvidia-container-toolkit=${NVIDIA_CONTAINER_TOOLKIT_VERSION} \
      nvidia-container-toolkit-base=${NVIDIA_CONTAINER_TOOLKIT_VERSION} \
      libnvidia-container-tools=${NVIDIA_CONTAINER_TOOLKIT_VERSION} \
      libnvidia-container1=${NVIDIA_CONTAINER_TOOLKIT_VERSION}
下面yaml文件是不带加速的
name: immich_remote_ml

services:
  immich-machine-learning:
    container_name: immich_machine_learning
    # For hardware acceleration, add one of -[armnn, cuda, rocm, openvino, rknn] to the image tag.
    # Example tag: ${IMMICH_VERSION:-release}-cuda
    image: ghcr.io/immich-app/immich-machine-learning:${IMMICH_VERSION:-release}
    # extends:
    #   file: hwaccel.ml.yml
    #   service: # set to one of [armnn, cuda, rocm, openvino, openvino-wsl, rknn] for accelerated inference - use the `-wsl` version for WSL2 where applicable
    volumes:
      - model-cache:/cache
    restart: always
    ports:
      - 3003:3003

volumes:
  model-cache:
在局域网内的其他设备上,通过浏览器访问 http://你的IP地址:3003,如果显示以下内容,说明配置成功:
{
  "message": "Immich ML"
}4.导航到机器学习设置
5.点击添加网址
打开 NAS 的 Immich 网页管理端,进入 设置 – 机器学习设置。
在 URL 中添加 http://你的IP地址:3003,然后再删除原本的默认链接。
在 智能搜索模型 中手动输入 XLM-Roberta-Large-Vit-B-16Plus(无需手动下载模型)
保存设置后,手动执行一次智能搜索任务。
http://10.10.10.11:3003http://immich-machine-learning:30036.使用远程机器学习容器的 URL 填充新字段,例如http://ip:port
4、docker安装,GPU加速
如果你的immich是部署在有GPU得机器上,可以选择开启GPU硬件加速,可以提高搜索、识别得速度。参考compose中注释掉得部分
官方文档:Hardware-Accelerated Machine Learning | Immich
1.确保远程服务器安装了 Docker
将以下内容复制到远程服务器docker-compose.yml
信息
如果使用硬件加速,还需要添加hwaccel.ml.yml文件,并需要按照硬件加速文档中的说明进行配置docker-compose.yml
四、Immich 反向地理编码汉化
官方地址:https://github.com/ZingLix/immich-geodata-cn
如何使用
1、在 Release 页面 下载 geodata.zip 和 i18n-iso-countries.zip 两个文件并解压
2、配置 Docker 容器映射
修改你的 docker-compose.yaml,在 volumes 中添加以下挂载(或按你的部署方式替换目标文件夹):
如果使用的是官方 immich-app/immich-server 镜像,修改路径如下
# immich 版本 >= 1.136.0
volumes:
  - ./geodata:/build/geodata
  - ./i18n-iso-countries/langs:/usr/src/app/server/node_modules/i18n-iso-countries/langs

# immich 版本 < 1.136.0 (不含)
volumes:
  - ./geodata:/build/geodata
  - ./i18n-iso-countries/langs:/usr/src/app/node_modules/i18n-iso-countries/langs
如果使用的是 imagegenius/immich 镜像,修改路径如下(感谢 huazhaozhe #18)
volumes:
- ./geodata:/app/immich/data/geodata
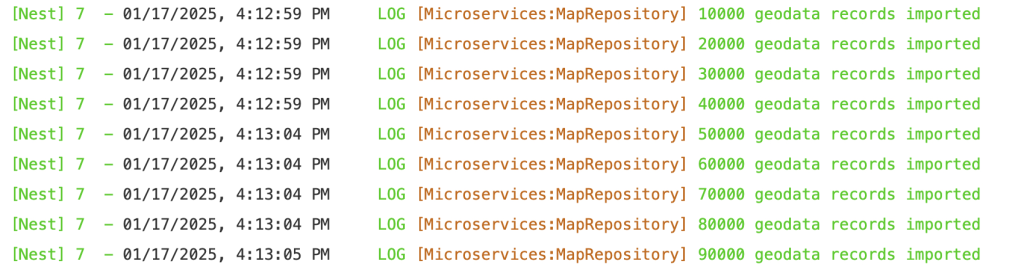
- ./i18n-iso-countries/langs:/app/immich/server/node_modules/i18n-iso-countries/langs3、重启 Immich
- 启动日志中若出现类似 10000 geodata records imported,说明 geodata 已成功更新。
- 若无此日志,可尝试修改 geodata/geodata-date.txt 中的日期为当前时间,Immich 只会在文件日期新于上次加载时更新数据。
4、刷新元数据
注意:仅在首次使用本项目提供的地理数据时需要执行此步骤,用于更新所有已有照片的位置。
后续新增照片无需重复此操作。
进入「系统管理 – 任务」页面,点击「提取元数据」中的「全部」,触发对所有照片位置信息的刷新。任务完成后,所有照片的位置将显示为中文地名并支持中文搜索。
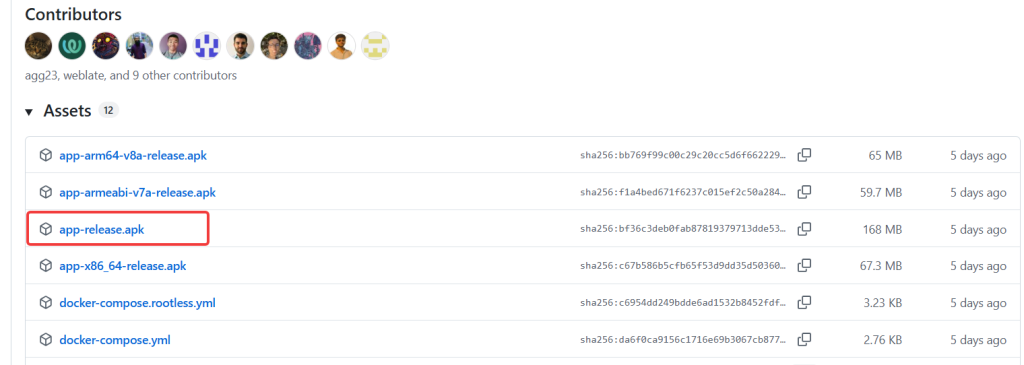
四、手机版本下载